Hydraulic cylinders are the core actuators of garbage compactors. All compression actions, including the vehicle's sliding plate, scraper, material pushing, lifting, and filling/resetting, are driven by hydraulic cylinders. Prolonged high load compression of municipal solid waste and mixed solid waste can easily lead to problems such as piston rod wear, oil seal leaks, internal cylinder leakage, jamming during extension and retraction, and insufficient pressure relief.
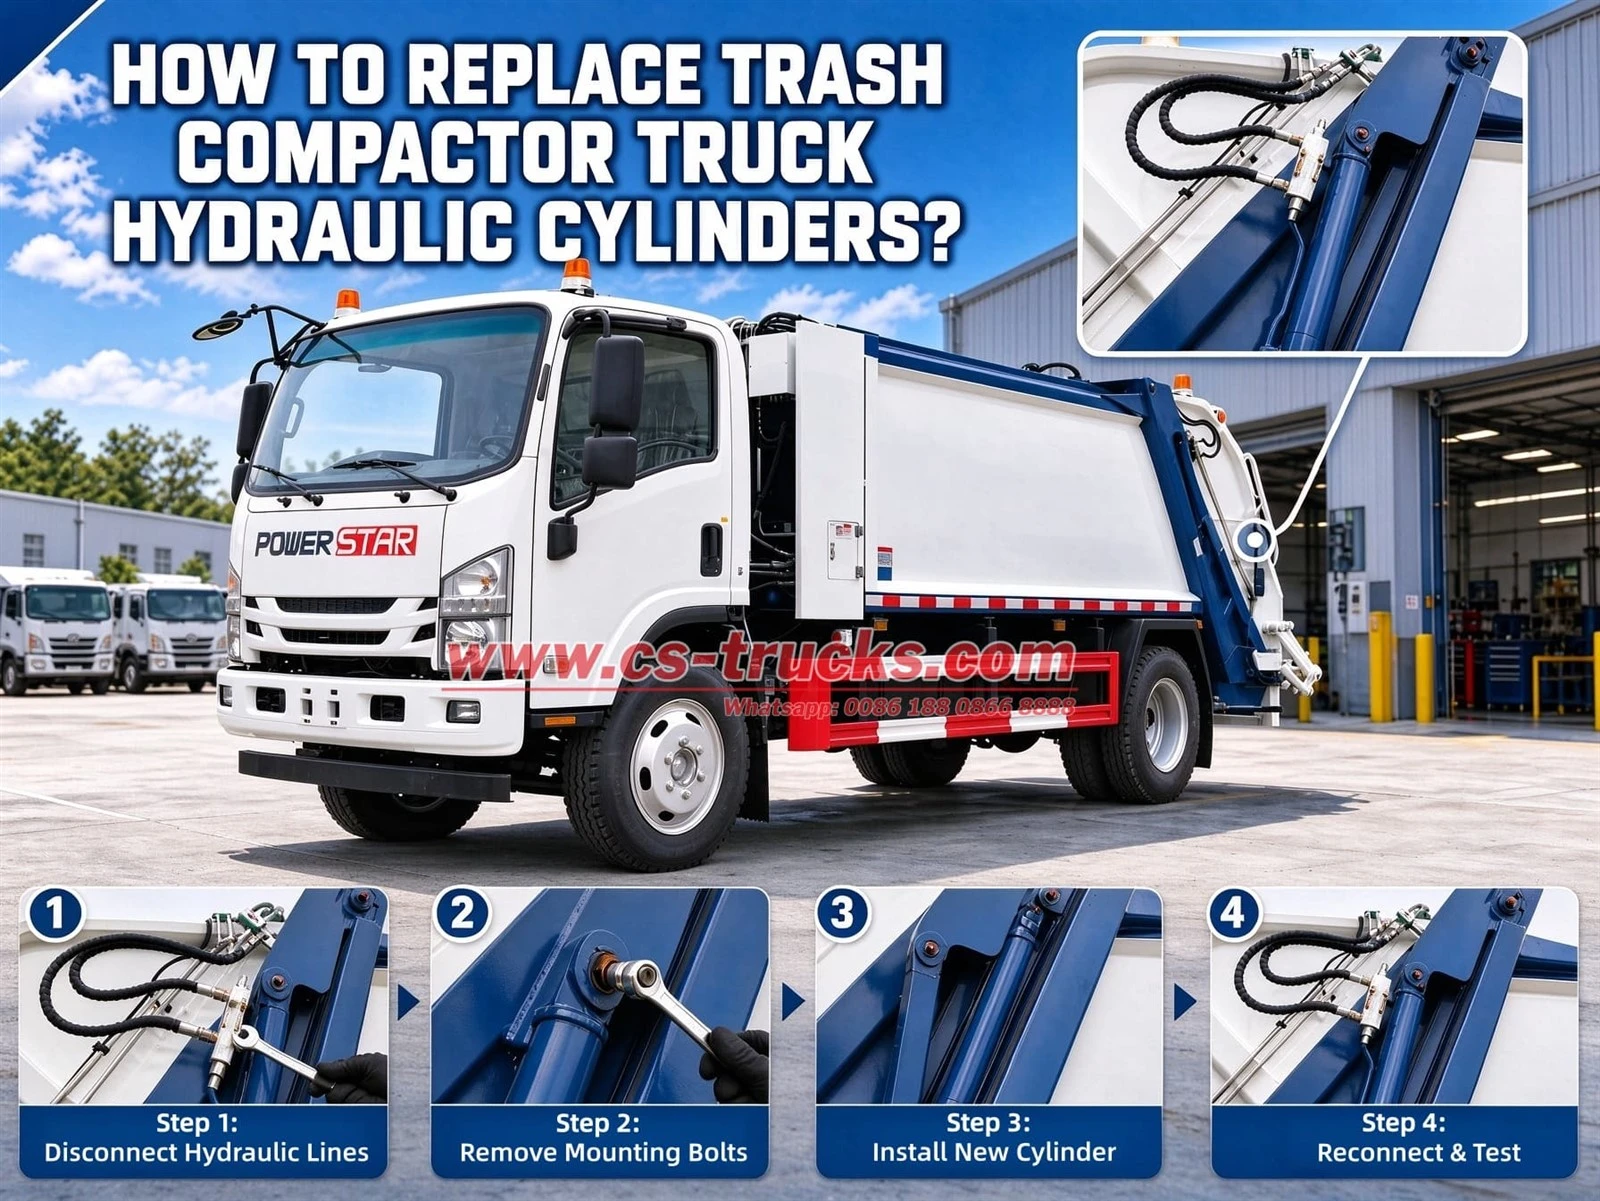
Many buyers and maintenance personnel frequently encounter problems such as incorrect disassembly/reassembly sequences, failure to depressurize during disassembly/reassembly, impurities entering the pipeline, and incomplete venting, leading to repeated damage to the new hydraulic cylinder shortly after installation. This article provides a standardized and readily applicable tutorial on the complete process of replacing hydraulic cylinders for garbage compactors from a professional foreign trade maintenance perspective. It includes safety guidelines, step by step operations, key points to avoid pitfalls, testing standards, and solutions to common faults.
What Preparations Are Needed Before Replacement?
The hydraulic system of garbage trucks operates under high pressure and heavy load. All replacement operations must strictly follow the safety procedures for stopping and depressurizing, and disassembly and assembly under pressure are strictly prohibited.
1. Essential Safety Prerequisites
- Park the vehicle on a level surface, turn off the engine, engage the handbrake, disconnect the power, and turn off the vehicle's main power switch.
- Repeatedly operate the hydraulic handle several times to completely release any residual pressure in the system.
- Lock down the work area; personnel are prohibited from standing within the cylinder's extension/retraction range.
- If replacing the lifting or loading cylinder, a mechanical safety support must be installed to prevent the risk of falling due to its own weight.
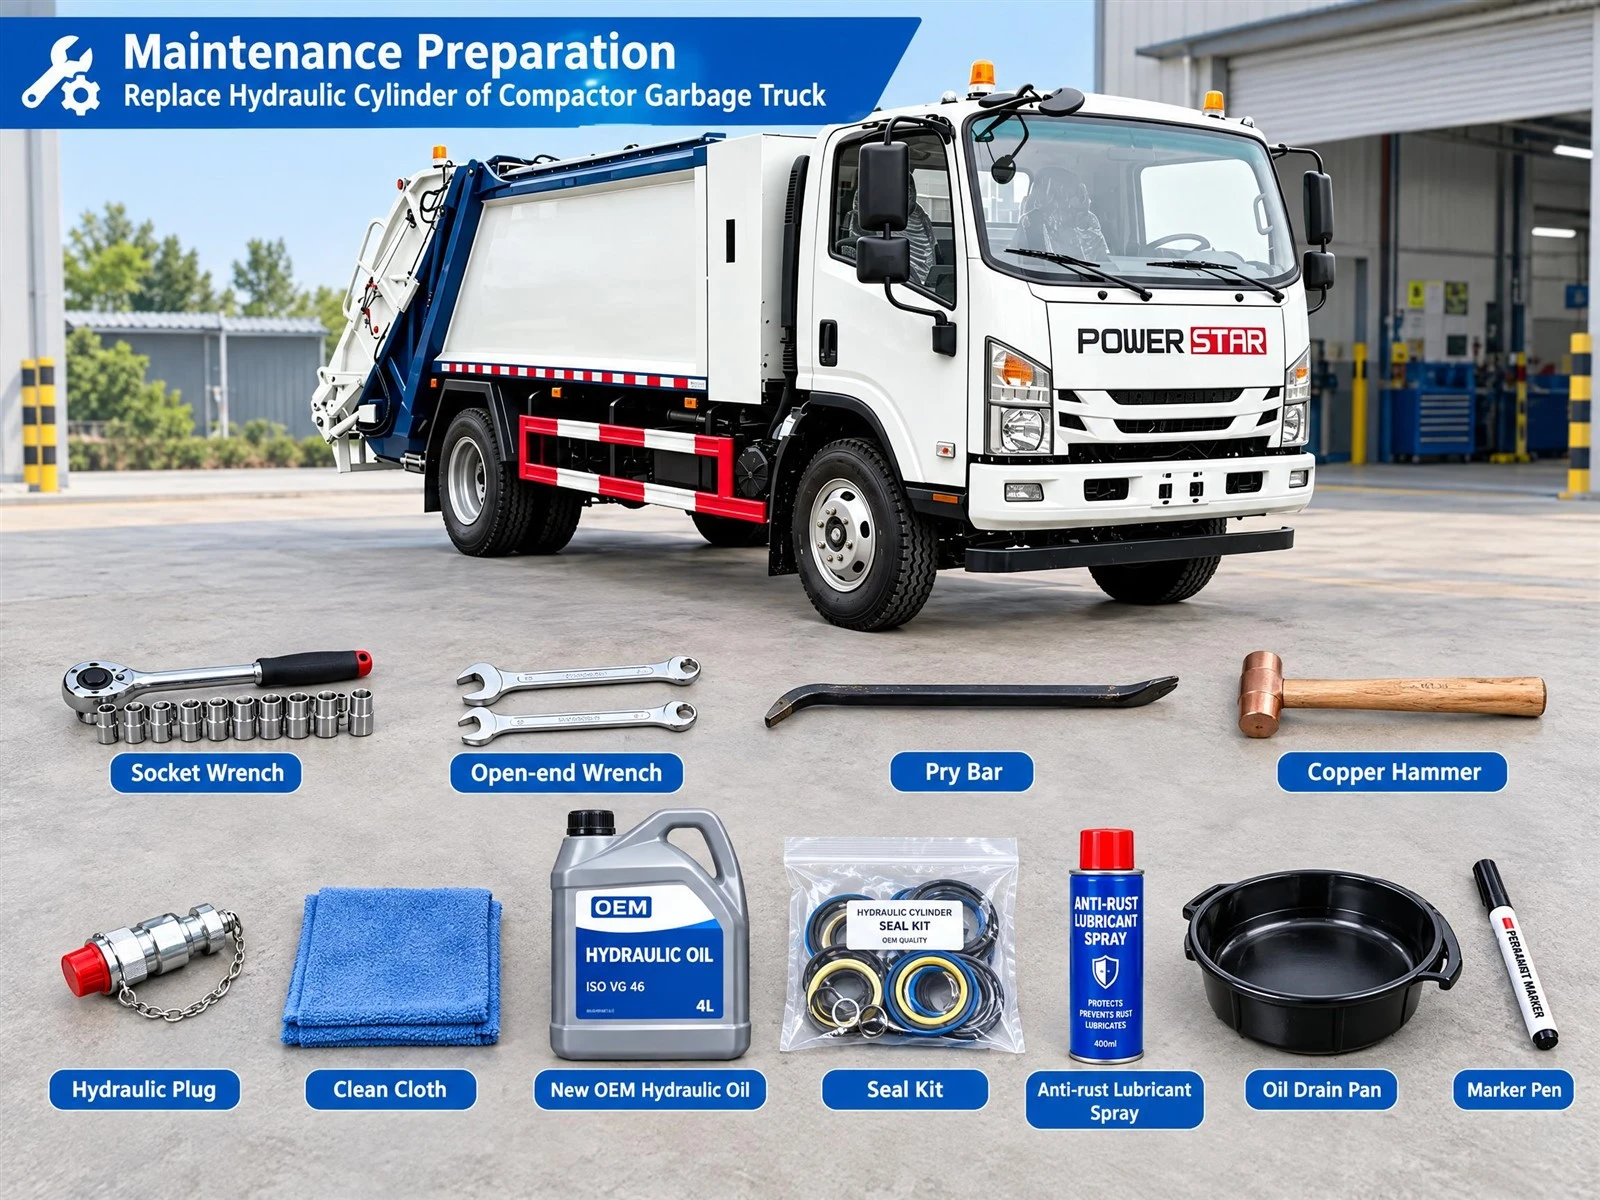
2. Required Tools And Consumables
Socket wrenches, open end wrenches, pry bars, hammers, hydraulic plugs, cleaning cloths, brand new genuine hydraulic oil, sealing kits, rust-preventive lubricant, oil trays, and markers.
3. Principles for Selecting Components
Replacing a hydraulic cylinder requires matching the original vehicle's installation parameters: installation center distance, cylinder bore, rod diameter, stroke, pin bore diameter, installation method, and pressure rating.
It is recommended to prioritize using the same model of original equipment manufacturer (OEM) or standard universal hydraulic cylinder to avoid problems such as insufficient thrust, stroke deviation, incorrect mounting hole positioning, and hydraulic system overload alarms caused by non standard cylinders.
How to Replace Trash Compactor Truck Hydraulic Cylinders?
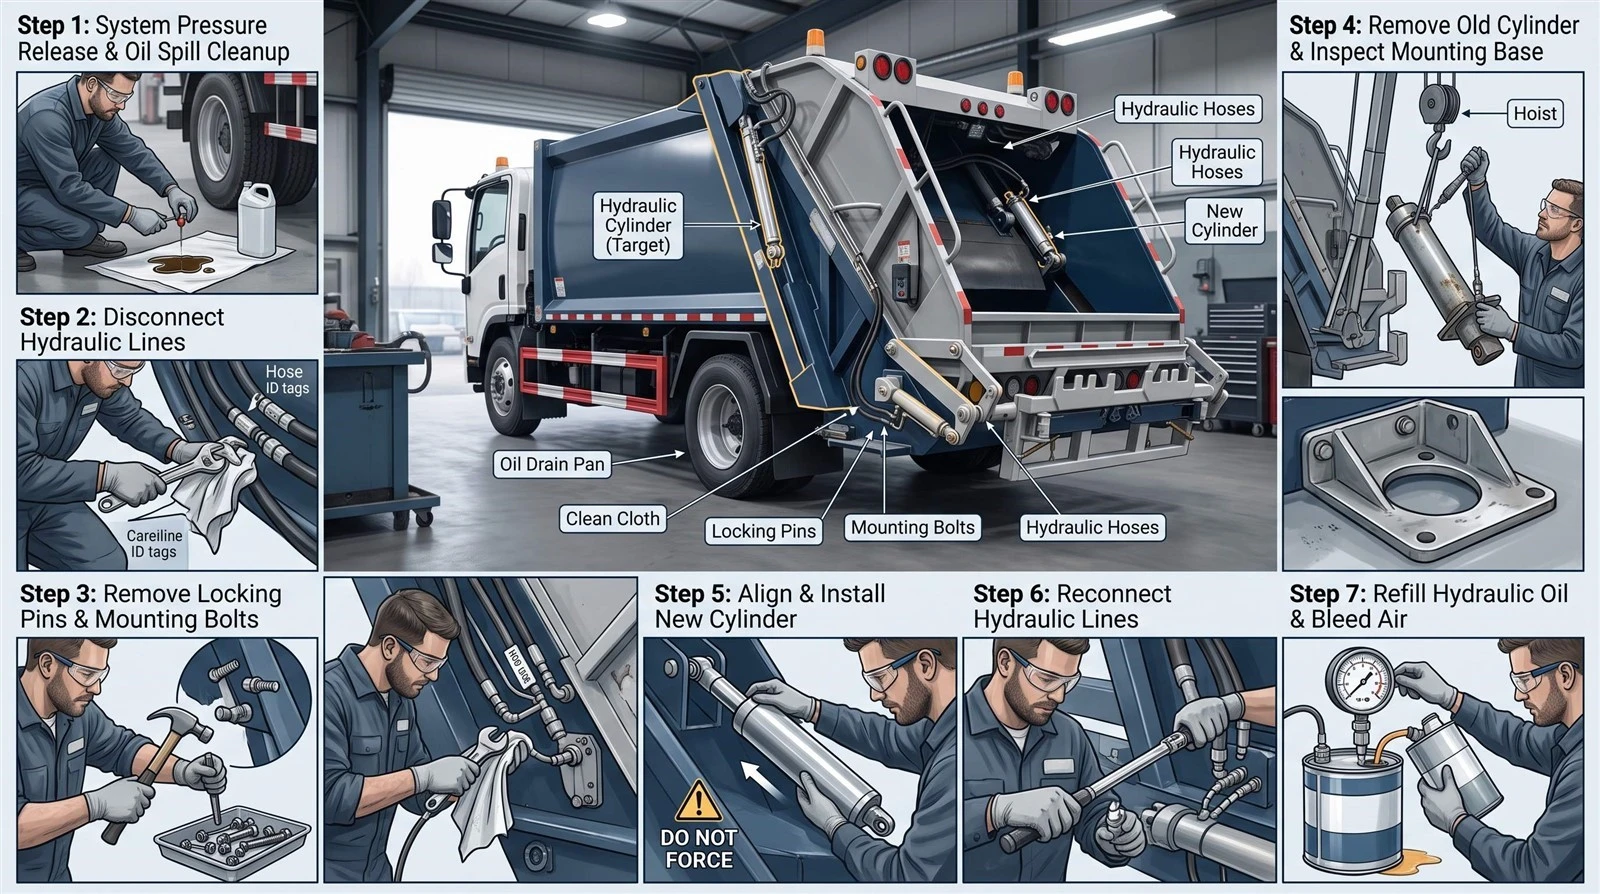
Step 1: System depressurization and oil removal
After the engine is turned off, repeatedly operate the hydraulic handle to release residual pressure and clean the mud and debris on the surface of the cylinder to prevent impurities from entering the hydraulic circuit during disassembly and assembly, which could cause valve blockage and hydraulic pump wear.
Step 2: Disconnect the hydraulic lines
Align the oil collection pan with the connector and slowly loosen the oil pipe to drain the remaining hydraulic oil; after removing the hose, immediately use a plug to seal the oil pipe opening and the cylinder oil port to prevent dust and moisture from entering the oil circuit.
Step 3: Remove the pin and fixing bolts
Remove the cotter pin and retaining ring from the shaft. Gently tap the shaft with a copper hammer to remove it; do not strike it with a heavy hammer as this may deform the hole. Disconnect all mechanical connections and remove the old hydraulic cylinder.
Step 4: Base inspection and cleaning
Remove the old hydraulic cylinder gently, protecting the piston rod surface. Clean rust and burrs from the mounting lugs and inspect the mounting holes for wear; if the base hole wear is not repaired, the new hydraulic cylinder will be subjected to eccentric force and will fail quickly.
Step 5: Install the new hydraulic cylinder
Inspect the new hydraulic cylinder for appearance, piston rod, and oil seals to ensure they are intact. Align the mounting holes and insert the pin, then install the retaining circlip and anti loosening washer to ensure the cylinder is free from misalignment and binding, and that the extension/retraction stroke matches the mechanical structure.
Step 6: Reconnect the hydraulic lines
Check the direction of the inlet and outlet ports. Reversing the connections is strictly prohibited, as it will cause damage to the mechanism due to reverse impact. Tighten the connectors evenly diagonally to prevent leakage or stripping.
Step 7: Adding Oil and Bleeding the System
Add the specified type of hydraulic oil. At idle, repeatedly extend and retract the hydraulic cylinder throughout its full range to purge air from the pipes and cylinder until the movement is smooth and free of vibration or abnormal noise. Incomplete air removal will result in weak compression.
No Load + Load Dual Test Acceptance Standard
After replacement, the equipment cannot be put into operation immediately. It must undergo dual testing and meet the standards before it can be put into operation.
1. No Load Test
Repeatedly extend and retract the hydraulic cylinder under no-load for 10–20 cycles, and observe:
- Smooth piston rod extension and retraction, no abnormal noise, no vibration
- Zero leakage at oil pipe joints, cylinder head, and oil seal locations
- Precise and complete movement, no overtravel, no jamming
2. Actual Load Test
Load normal waste material and execute a complete compression cycle: slide plate presses down, scraper retracts, pusher plate pushes, and full load pressure holding.
Confirm stable pressure holding, qualified compression force, no pressure drop or slippage, no external leakage, and normal system pressure with no alarms.
Common Mistakes and Tips for Avoiding Pitfalls
1. Pressed Disassembly and Assembly
Disassembling pipes without fully depressurizing can easily cause high-pressure oil spray, resulting in injury or sudden joint detachment. This is a high risk operation.
2. Unsealed Pipes
Open oil lines allow impurities to enter, leading to chronic malfunctions in the vehicle's hydraulic system. Repair costs far exceed those of the cylinder itself.
3. Forceful Striking of Pins
This causes hole deformation, pin wear, and eccentric stress on the new cylinder, significantly shortening its lifespan.
4. Reversed Oil Connections
Reversed mechanism operation directly impacts the frame, scraper, and slide plate, causing mechanical structural deformation and damage.
5. Omitting the Bleeding Step
Residual air causes hydraulic cavitation, unstable operation, and weak compression, eventually damaging the pump and valve assembly.
6. Failure to Check Base Wear
Excessive play in the old base causes the new cylinder to remain stuck, leading to oil leaks and eventual failure within 1-3 months.
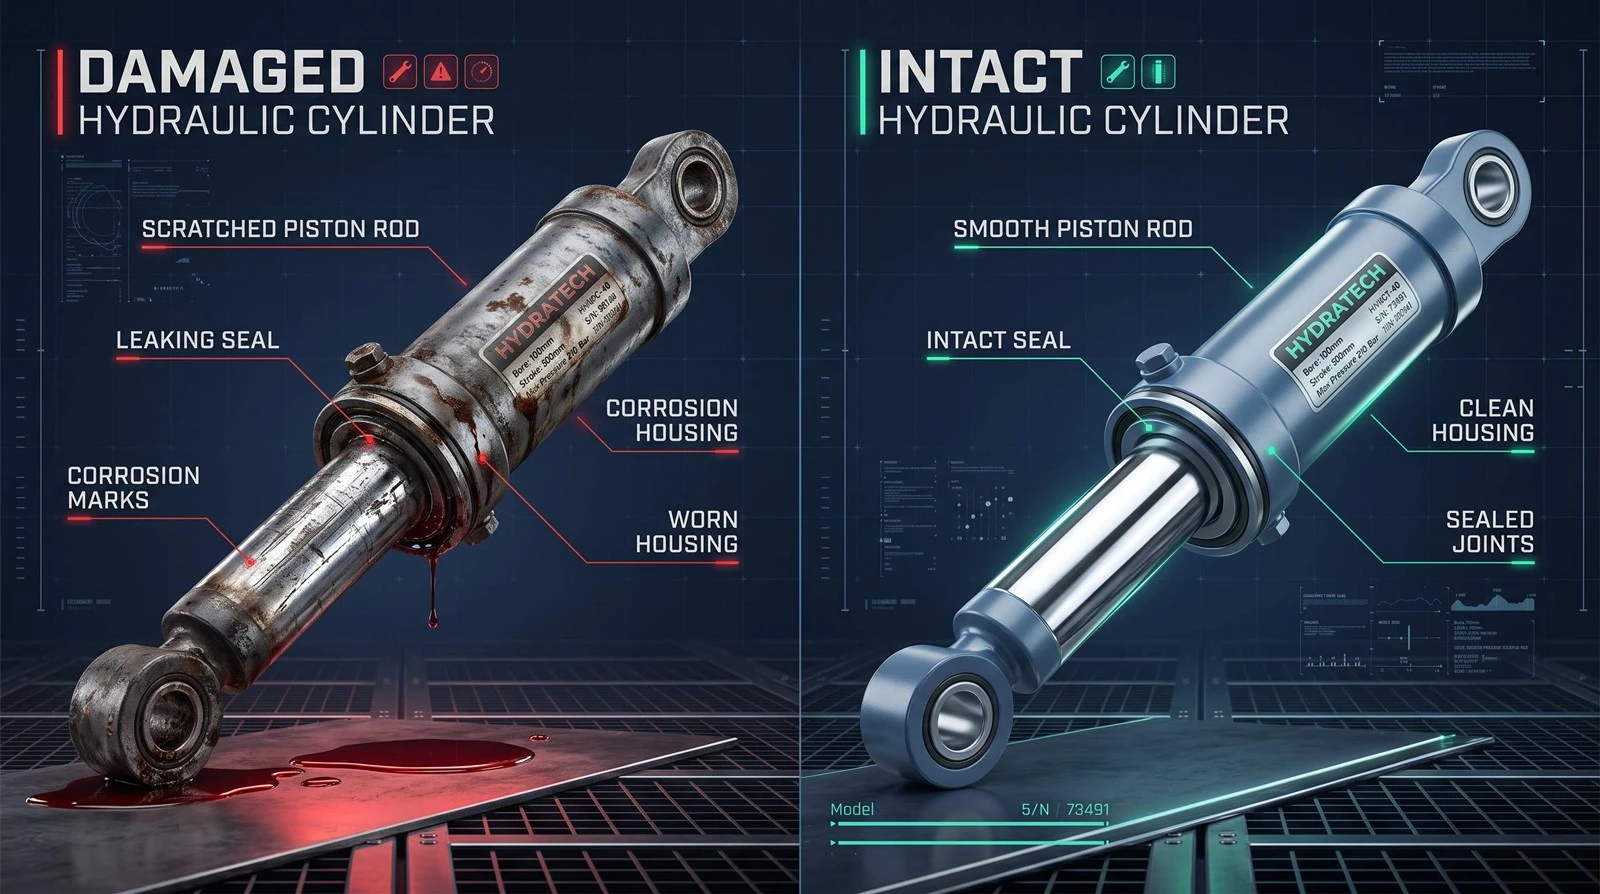
How To Maintain A New Hydraulic Cylinder
1) Before daily operation, inspect the piston rod surface to ensure it is clean, free of dirt, sand, and scratches.
2) Never overload the cylinder with large, hard objects or scrap metal to avoid overloading and deformation.
3) Regularly check for aging oil pipes and loose joints to prevent leaks.
4) During rainy seasons and in humid environments, regularly apply grease to the pins and hinge points.
5) Change the hydraulic oil and clean the filter element every six months to ensure a clean hydraulic system.
Frequently Asked Questions
Q1: Can I replace only the oil seal and not the entire cylinder if there's a minor oil leak in the hydraulic cylinder?
A: If it's just an aging oil seal, minor external leakage, no scoring on the cylinder wall, and no deformation of the piston rod, the sealing kit can be replaced separately. If there's internal leakage, cylinder wear, a bent piston rod, or pressure relief/dropped stroke, the entire hydraulic cylinder must be replaced.
Q2: What causes vibration after replacing the hydraulic cylinder?
A: 90% of the time, it's due to air not being completely purged from the hydraulic system. Other causes include uneven joint tightness, minor blockage in the hydraulic system, and installation misalignment.
Q3: Are hydraulic cylinders from different brands of garbage trucks interchangeable?
A: As long as the stroke, cylinder diameter, rod diameter, installation distance, and pressure rating are the same, they are interchangeable. Brand does not affect use; this is the mainstream cost saving replacement solution overseas.
Q4: How often should a new hydraulic cylinder be inspected after installation?
A: A reinspection should be conducted on the day of installation and trial operation, followed by a second inspection for leaks and tightness within 7 days. Afterward, it should be included in routine monthly maintenance.
Conclusion
Replacing the hydraulic cylinders of garbage compactors may seem like a simple disassembly and assembly, but it is actually a standardized and highly rigorous hydraulic system maintenance project. A standardized procedure for depressurization, sealing, alignment, venting, and testing not only resolves issues like oil leaks, insufficient power, and jamming in one go, but also protects the vehicle's hydraulic pump, multiway valves, and piping system, preventing secondary failures and high repair costs.
For sanitation vehicle fleets and equipment purchasers, mastering the standardized cylinder replacement procedure can significantly reduce downtime, lower maintenance costs, and extend the vehicle's lifespan. It is a core skill for refined operation and maintenance of sanitation equipment, achieving cost reduction and efficiency improvement.